Thursday, August 11, 2016

*the* Kitchen Remodel's Inspiration

As in, *the* kitchen I will live with forever. Mainly because I will be paying for it forever. Yes, I know that this is not only an economy makeover, but it will be paid off much sooner than forever. Still, I like to think of my pay-off date as similar to "infinity minus one."

That said, this place has to be freaking amazing.

As much as I like to wing it, you know I have a plan for this thing. Simply put, the plan is on-trend painted cabinets, butcherblock counters, a timeless backsplash, plus an apron front sink! To balance out all the new I'm planning on saving the existing tile floors...at least for now(#apennysaved). As far as the color of the cabinets, I'm planning on doing white uppers and colored lowers plus some open shelving.

If I'm being honest with myself, I know that you'd rather look at inspo pics before reading another word. So take it away, Pinterest:


So many of the details are still falling into place, but the goal is to create a kitchen that toes the line between trendy and classic. The colored cabinets are obviously the "soooo 2016" piece, but at the end of the day it's just paint. The backsplash, counters, sink, fixtures, and appliances are definitely some of the pieces I hope will last me at least another decade.
 
*fingers crossed*
 

Sunday, August 7, 2016

The Not-So-Planned Kitchen Remodel

In case you're not thoroughly turned on by the thought of glitter paint (So simple! So sexy!), we can move on to something more universally appealing. The single project I'm most excited to undertake - and you should be too - is my kitchen remodel! Originally I didn't even plan to touch anything more than the appliances and (maybe) the counters, but sometimes you lose battles with yourself.

At least I do.


Sorry, I never bothered to take pictures before turning it into a work zone.

THE THOUGHT PROCESSES:

Plan A: When looking at the house prior to making my offer I planned to repaint the cabinets (DIY) and get a new fridge. That'd run me about $2,000 because fridges are expensive. Oh well. If (and only if) I came in under budget, I'd consider changing the counters.

Plan B: During the inspection, I discovered how nasty the range was. No way I could cook my frozen pizzas in there. Plan B became Plan A + a new range. And if I'm getting a new range, I might as well get a new dishwasher and range vent because no point in having almost all new appliances. Now I'm guesstimating around $3,500. Beads of sweat roll down my forehead.

Then what had happened was the night after closing I come over to start some projects and help my roomie move in. The more I look at or thought about the kitchen, the more I just got generally skeeved out. As in, I didn't want to unpack my kitchen stuff or store food in this place.

[Repeat after me: you are not a princess, you are not a princess. You can live like this because you are not a princess.]

The cabinets were original to the house (built in 1978) and at some point were painted from a very dark wood to white. The insides were still dark and basically black holes. I had no idea what (or who) was living back there. The counters were actually floor tiles that were slightly sticky to the touch, no matter how hard you tried to clean them. Add poorly maintained grout to the equation and it became clear the counters were goners too.

I debated getting the cabinets professionally painted (inside and out, around $500 because no way I was DIYing the black holes). Then I imagined what all could go wrong as we removed the old counters, damaging my freshly painted cabinets possibly past the point of repair. I also considered what happens if I spent all that money and the old cabinets still grossed me out. Or what if I spent all that money just to want a full kitchen reno down the line. I hate being wasteful with my money more than I hate going over budget.

At this point, I was starting to accept the inevitability of a full kitchen overhaul as well as recognize the benefits.

Have a kitchen I love right from the get-go.

Be proud to host friends or family without having to tell them how much I hate the kitchen or how I plan to re-do it.

Not paying a ton of money to half-ass something.

My mind was made up, but now I had to figure out how to do this as economically as possibly. Remember, I only budgeted about $2,000-$2,500 to make the kitchen livable when I made my offer. Every penny over that hurt my heart.

THE SELECTION PROCESS:

I looked into Ikea kitchens, but was a little taken back by the costs. While still very economical as far as kitchen remodels go (about $3,500 for basic components in my layout) I was living in a constant state of sticker shock. On top of that, I'm not in love their new Sektion cabinets. Everyone else in blog-land may disagree with me on this so don't get me wrong, they look great. They just don't feel great.


The inside boxes are MDF either in white-white or espresso, neither of which really jived with my aesthetic. Several of the cabinet faces (including all the white/off-white styles) are made of a plastic feeling material so to get the feel of wood I'd have to go for one oak style available and finish them myself. My only other option was to get custom made fronts (like Semi Handmade), but that did nothing to help my bottom line.

On top of all that, Ikea cabinets just lacked the custom feel that I hoped for. Not "top of the line" custom, but "I'm the only person in the world with this kitchen" custom.

Rule number one of Reno-Club is you do not spend money on things you don't love.

Rule number two of Reno-Club is you DO NOT spend money on things you don't love.

THE RAY OF LIGHT:

Desperately exploring other options I stumbled across the stock cabinet section of Lowe's. My brother and I had previously used some of their stock cabinets in the laundry room of the Woodward Place and we were pretty happy with how they turned out.


Lowe's does have a new line of cabinets called Nimble (similar to Ikea's Sektion), but I knew I was going in a different direction. The classic oak unfinished cabinets have real wood fronts and feel much higher quality than Sektion or Nimble. I also had a Lowes coupon for 10% off and hit up their 4th of July sale for an extra 20% off stock cabinets. After everything, to buy all the kitchen cabinets I was looking right around $1,000. Sold.

So we'll call the final iteration Plan C. At this point, I'm planning on around $6,000 for a new kitchen, top to bottom. I'm thrilled with the value of everything I've chosen so far and it's way less than I ever anticipated being able to pull off a full kitchen remodel. Still, at the end of the day that's pretty heavy for an unanticipated cost.

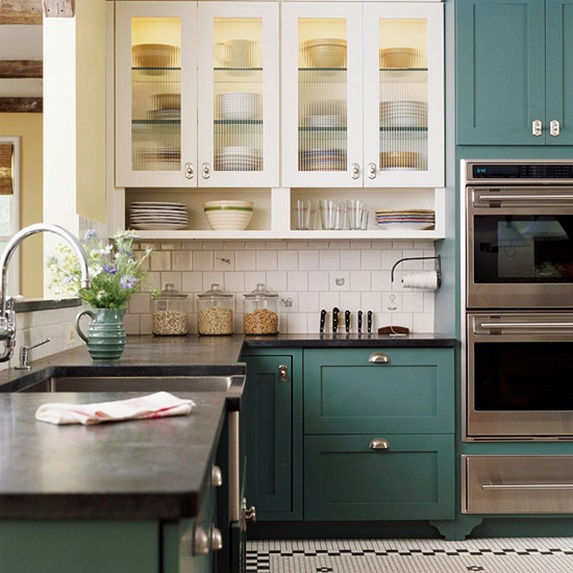
The last pre-demo pic of the kitchen and a glimpse at the new cabbies.
 
Hopefully within a few weeks, I'll have a pretty new kitchen to prepare my Ramen and Hamburger Helper in. #poorpeoplefood #houserich...

Friday, August 5, 2016

Closet, Closet, Closet!!!

It seems fitting that the last project I shared at the Woodward Place was my Ikea closet makeover and the first I'm sharing here is a closet makeover (what can I say... I'm a girl). Here goes nothing...

I have a pink, glittery closet y'all.

I wish you could see the glitter in pics. Trust me, it's there.

 It's a very, very, very faint pink. You almost wouldn't notice it if it weren't for the glitter smacking you in the face. Barbie would approve.

I got pretty lucky that this closet had an existing system in it; it wasn't nearly as fancy as the Ikea closet I built last year but it was free...or umm... built into my mortgage. The problem with the closet before is it was straight up nasty. Brown paint, dirty brown carpet that needed to be stretched, a poorly patched hole in the ceiling, and a pad-lock on the door. I shit you not, I saw the lock on the door during our inspection and seriously debated pulling out of my contract. What are we trying to keep from coming out?

Boo.

A lot of the nastiness was helped when the carpet was replaced (along with all the bedrooms). After that, I just painted my little heart out. The bad lighting is yet to be addressed. Another big improvement was Clorox wiping the whole thing. If you're into insider trading, buy into Clorox now cause I'm sending that stock through the roof.

As much as I love it now, pale pink wasn't the original plan. I originally wanted to do Dalmatian spots all over my walls, per people on Pinterest with way more class and money for wallpaper than me.


Found a tutorial, tested it out. It was love at first sight.

Then I started applying it to my walls. And it was terrible.

 Pretty sure if I kept going, I'd need to lay down every time I came in.

After I finally got my eyes to focus, I realized it looked a Lisa Frank kindergarten art project. Or finger painting. I wanted to stop immediately, but my friends kept saying, "looks great" or "you'll like it when you're done." After resolving to try it over a larger area I was forced to admit I still hated it.

Disclaimer: if any part of you thinks the Dalmatian Spots were fabulous, I urge you not to try it at home. That business had to be sanded down and took about 6 coats of paint to cover. If you still love the trend (like I do), splurge on the wallpaper.

Back to my mental list of Things You Can Not Do When You Live with a Man and it didn't take long for me to settle on pink and glitter:


I was going for girly. I got Elle Woods.

One gallon of the lightest pink paint I could find that didn't look like it belonged in a nursery and two packs of paint crystals (one silver, one gold) and voila! The most spectacular sparkly closet I ever did see.

If you are considering using paint crystals in the future, I have two tips:
  1. The glitter is much more visible in rollered sections. Getting the edged-in trim to show glitter would have been a Dumbledore level magic trick. Role as much as possible. Seriously, don't underestimate the difference.
  2. You probably shouldn't mix in the paint crystals until your second coat. It's not a strategy that occurred to me until I was already all mixed up, but the second coat just painted over the first coat's crystal. It could have been doubly as sparkly if I hadn't split my crystals through a whole gallon and mixed them all into the final coat. You don't need a glittery primer, so why would you want a glittery first coat? Hind sight is 20/20.
Full Blognesty: No, I don't have an empty closet in my bedroom just waiting to be filled up. I still have miles to go (and a few trips to Ikea) when it comes to organizing my closet, both with how I arrange in-season pieces and how lesser used/out-of-season items are stored. This post is not a full blown reveal. So why am I sharing it now? Because I'm too freaking excited about it.

Here is the closet in it's current state.

I don't have nearly enough stuff to fill it.

In my defense the piles on the floor are out-of-season or the size-too-small piles, NOT laundry. I've been saying I'll organize it for weeks, but instead I think I'll go braid friendship bracelets for me and my closet.

Toodles!